Listen to this Post
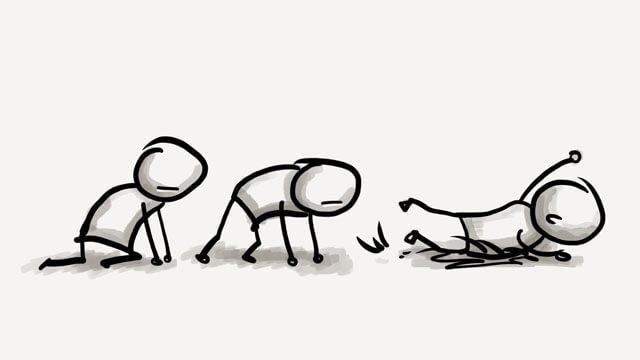
Ready. Set. Flop.
I spent a sleep-deprived week building my webpage. It looked complete and polished so I posted my first welcome message, promising three more articles next week and I showed the page to my friends, most of whom work in IT.
“Not too bad for a first try, Sebastian,” they said, “Here’s a list of 37 things you forgot to fix.”
My Week #2 didn’t go exactly according to plan. I’d hoped to spend the time building my online empire of recognition, fame, and fortune. Or at least write the three articles I promised. Instead, I was now stuck for the second night in a row dealing with a slightly misaligned magnifying glass in the top menu bar. I admit, I briefly considered if I needed that many friends after all.
But here’s the thing. Your webpage is the center of your online presence. It’s the business card of your brand. Online, it’s who you are and how people perceive you. You only get one chance to make an excellent first impression. After all, people spend, what? Half a second forming an opinion of a site? Make it count.
Since I launched, I received questions from other writers working on their platforms, so I decided to put together a reference (at least for the website part). I’ll keep it updated as time goes by.
Let’s get the most important question out of the way first.
What is a Writer’s Platform?
The best definition of a Platform I found comes from Jane Friedman’s “The Business of Being a Writer.” Her no-nonsense book shattered every illusion about a writer’s life I held dear and gave me a glimpse into how the publishing industry works. Here’s what she says about a Writer’s Platform:
“Platform is a challenging concept to discuss, partly because everyone defines it a little differently. My definition is this: an ability to secure paid writing opportunities—or sell books, products, and services—because of who you are or who you reach.”
Do I really need one?
A loaded question! I won’t go into that debate now. But feel free to chat me up on Twitter @SebastianHetman.
The recipe for a website that makes you stand out.
Disclaimer: I will link to a lot of material, tools, and services I used. I am NOT affiliated with any, so I’m merely listing what worked best for me. I lost many hours looking for the most reasonable low-cost, high-gain options so I hope I can save you time by listing what I used.
Ingredients
1. Some money. This site cost me a total of $117. It’s not a lot, and if you’re serious about your writing, you should consider spending at least that much. Word of caution: be smart about what you purchase or you’ll end up splurging on unnecessary fluff. The key is to pay for stuff when you need it. Start with the cheapest options and scale up when the time comes.
2. Time. Get ready for some late nights. My estimate puts me at around 126 hours of development. It includes graphic design, copywriting, and at least one hour of crying.
3. A good headshot of yourself. Do yourself a favor and visit a pro or semi-pro photographer to take it. Try to smile.
Tools
1. Udemy – find a course on WordPress and an instructor you like. I picked THIS GUY because he provides you with a free test site where you can use all the premium plugins and themes he talks about without having to pay for them. The training takes time, but Greg walks you through the build process step by step.
2. Local by Flywheel – a fantastic app for hosting a local site on your computer. It gives you the option of transferring the site to flywheel’s hosting when you’re done.
3. Divi by Elegant Themes. After three failed designs I got really close to giving up and finding someone I could pay for building my site. Divi is a fantastic theme that lets you create websites using drag and drop. It’s like building LEGOs.
4. Coolors – to find a color scheme that works for you.
5. Photoshop or similar if you want to get fancy with graphics. Gimp is a free option. The instructor on Udemy will help you optimize your images for the web.
6. Namechekr – lets you search a handle
7. Hover – allows you to purchase your domain.
8. Flywheel – a hosting service for when you’re ready to put your site on the internet.
9. A bunch of WordPress plugins – I’ll list the ones I used under the article.
Sebastian’s Recipe
1. Research other author sites. List every contemporary author you ever read. Everyone who comes to your mind. Go through your bookshelf if you need to. Now visit their websites. Forget about the ones that make you go meh, bookmark the ones that make you go wow.
2. Take a piece of paper and try to draw how you’d like your website to look. By doing this, you’re giving yourself context for when you take the training. It’s easier to learn if you know what you’re working towards, right?
3. Complete the udemy training. Take your time to follow the instructor until you’re confident around WordPress.
4. Use Local by Flywheel to host the site on your computer. See how far you can get in achieving your desired design. Don’t get attached to this site. Expect to build again from scratch.
5. Use the free test environment the instructor offers. Go there once you’re comfortable with WordPress. Start your site. Apply the Premium Divi theme and play around. Try to build a homepage of your dreams. Don’t get attached to this one either.
6. Purchase Divi and develop a fresh site on your computer. You should be able to find discount codes on the web.
7. Use Coolors to come up with a color scheme that you like. I tested 20 different ones before I zeroed in on mine.
8. Find a handle you’d want to use and check it’s availability on Namecheckr. I recommend NameSurname. John Smith… I’m sorry. All others – go ahead and register accounts on Twitter/Facebook/YouTube under that handle.
9. Spend time on your copy. Take as long as you need to. After your visuals, the text will cement the impression you made on your visitors.
10. Present your writing beautifully. Find a good font pairing and use it consistently around your site. Divi has site-level typography settings.
11. Write a great About Me page. It’s the most visited part of every website. Make it authentic and engaging for your readers. They went there because they want to find out more about you or see if you’re trustworthy. I rewrote mine six times.
12. Install the plugins you need. You’ll find my list under the article.
13. Purchase your domain from Hover
14. Move your site over to Flywheel. Their local app allows you to do it with a click of a button. Once it’s online, point your domain to the site. Flywheel provides detailed instructions on the process.
15. Take a breath. Show your website to your friends and family. Reach out to me on Twitter @SebastianHetman if you’d like me to have a look as well. Fix all the technicalities people find. You can google a solution to most.
16. Don’t worry if fixing and polishing takes you as much time as the initial design. You’ll have good reason to feel proud once you’re done.
A website is only the first step, now you need to start engaging on social media, building your visibility and credibility. This stage can take longer than a year. Don’t worry, you’re off to a good start.
The good mindset
Once you commit to building your platform yourself, you will fly through so many technologies, concepts, and challenges that you’re likely to forget most of what you learned within a month. Don’t worry about it. This isn’t time to be perfect. Don’t obsess about understanding every detail, just get it done. You’re a writer, not a web designer. Consider this cramming for an exam.
It seems a lot of work, shouldn’t I hire a designer instead?
After having gone from no experience in web design to building a not-too-shabby site of my own, I’ll say– No. Do it yourself even if you sleep on a mattress of money in a house made out of gold. People can design a website for you, but you’ll end up taking care of it at some point anyway. It’s not that difficult if you put your mind to it, and you’re gearing up for challenges down the road.
That’s all. I hope it helps. If you have questions or comments, reach out to me on Twitter or leave a comment below. What’s your experience with platform building been like? Have you found better tools or services?
I use free versions of the following plugins. Most have a premium version, but I suggest you wait and grow your website first.
Askimet Anti-Spam – for when you start having SPAM.
All in One WP Security – A must have. The plugin guides you through the security setup.
Bloom – is a plugin that comes with Divi. It lets you grow your mailing list.
Contact Form 7 – An immortal plugin for configuring your contact form.
Divi Supreme Modules- A free extender that lets you get fancy. Optional to have.
Email Address Encoder – Protects your site from being harvested by bots for email addresses. Both yours and other people’s.
Google Analytics Dashboard for WP or Google Analytics for WordPress by Monsterinsights – Needed to start gathering data on your website usage.
Monarch – Also free with Divi – for ellegant-looking social media buttons.
Responsive Pricing Table – for offering services on your website.
UpdraftPlus – Backup/Restore to an external location.
wpDiscuz – a comment system you can see below. Why not give it a try?
YoastSEO – helps you with your webpage SEO.